Introduction to GitHub User Interface
Creating a repository
A Git repository is a data structure used to track changes to a set of project files over time. Repositories are stored within the same directory as these project files, in a hidden directory called .git. Information about the repository, changes to the files, and previous versions are all stored in this hidden directory so they are accessible but don’t get in the way.
You can create repositories using GitHub’s web interface, or on your own computer using the command line.
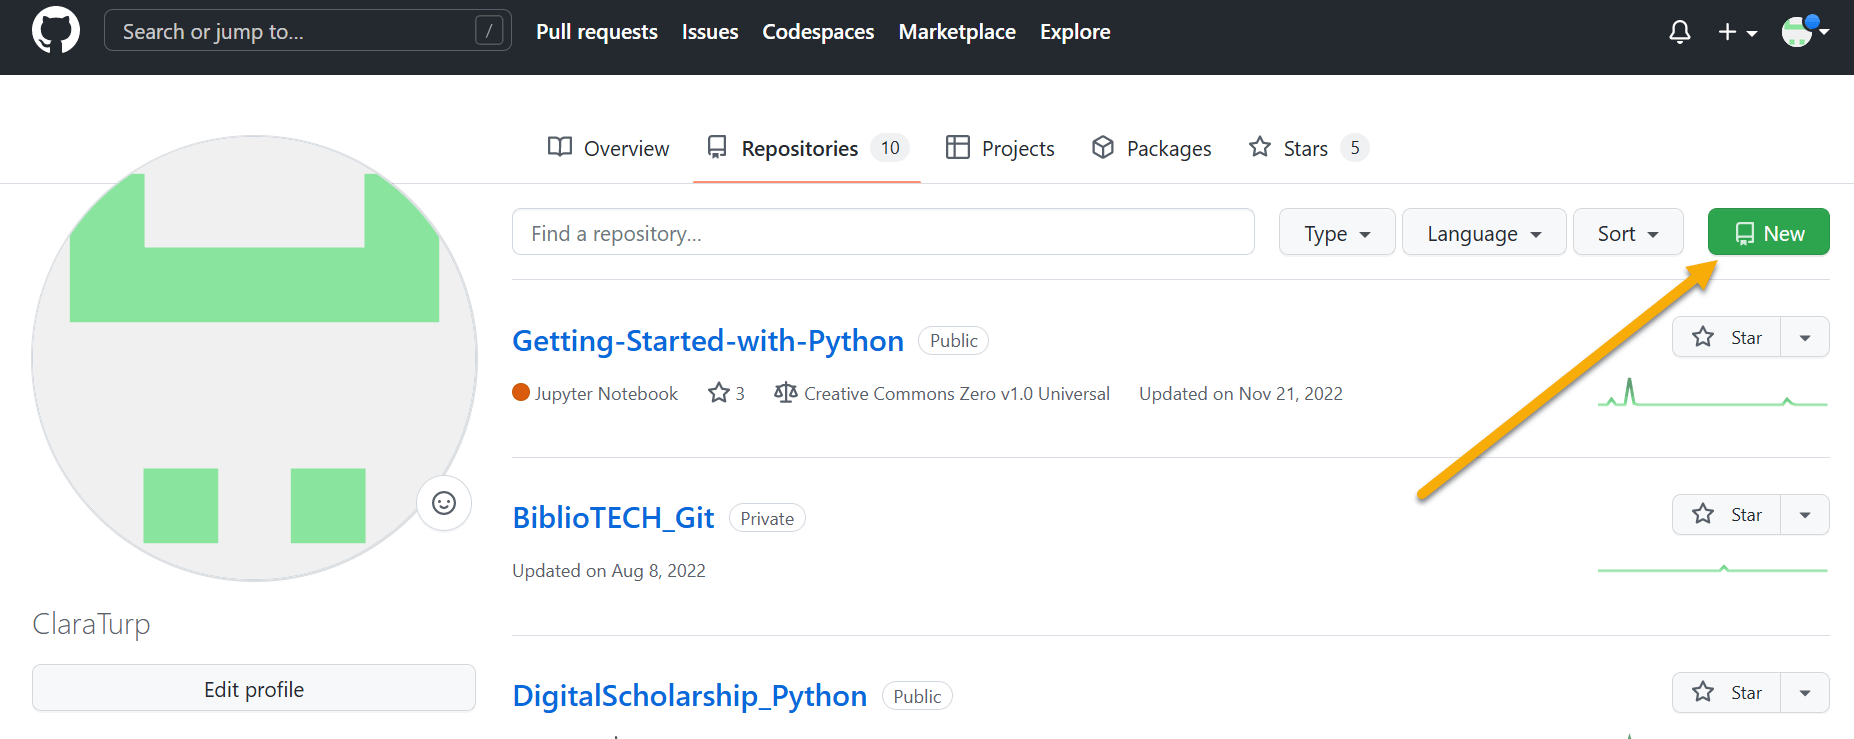
We will start by creating a new repository using the web interface.
You want to go to your GitHub profile, click on Repositories, and then the new green button on the right side of the webpage. Another way to create a new repository is to click on the plus sign at the top right corner of the header bar, in the options, you will see “New repository”.
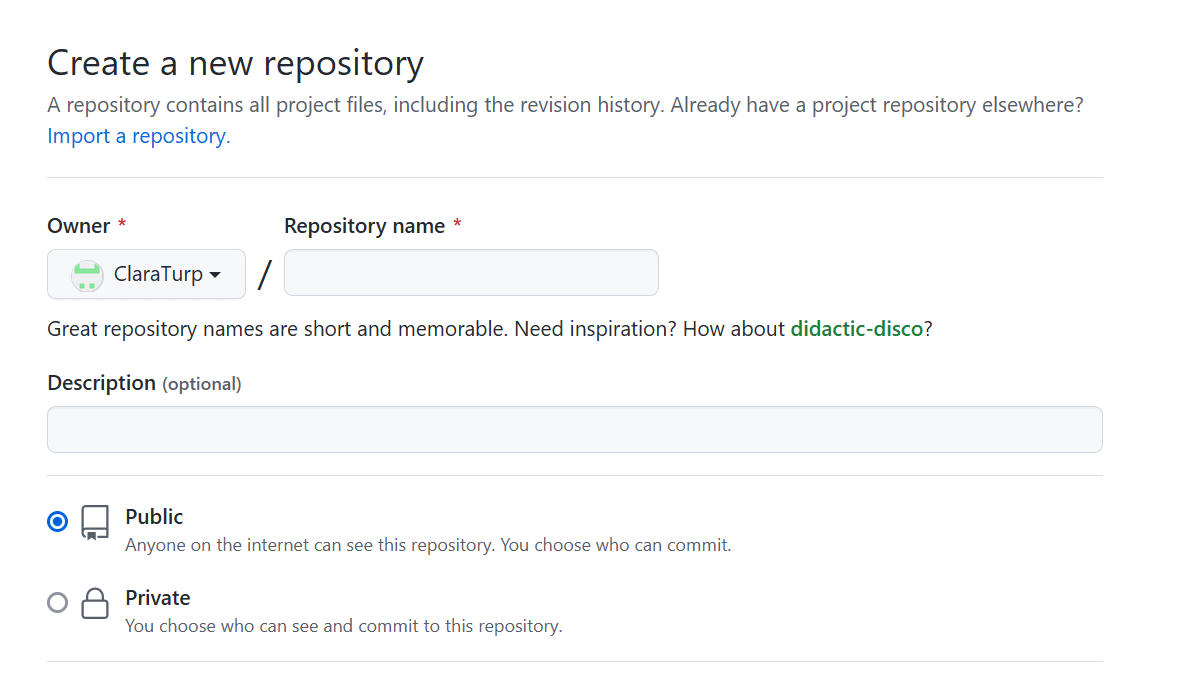
A page will appear with various questions about the repository you are creating:
Repository Name: Choose a name for your repository.
Description (optional): You can give a description for the repository.
Public vs Private:
- Public: Anyone on the internet can see this repository. You choose who can commit.
- Private: You choose who can see and commit to this repository.
Initialize this repository with:
- README file: A README file tells other people why your project is useful, what they can do with your project, and how they can use it. This documentation is a best practice.
- .gitignore: A .gitignore file, added to your repository’s root directory, tells Git which files and directories to ignore when you make a commit. This is used, for example, for configuration files or other files with personal information.
- A license: Though not mandatory, choosing a license is an important part of openly sharing your creative work online. For help selecting an appropriate license see https://choosealicense.com/.
For this exercise:
- Name the repository “hello-world”
- Add optional description
- Ensure repository is set to “Public”
- Add a ReadMe file.
- Choose a CreativeCommons license
- Click “Create repository”
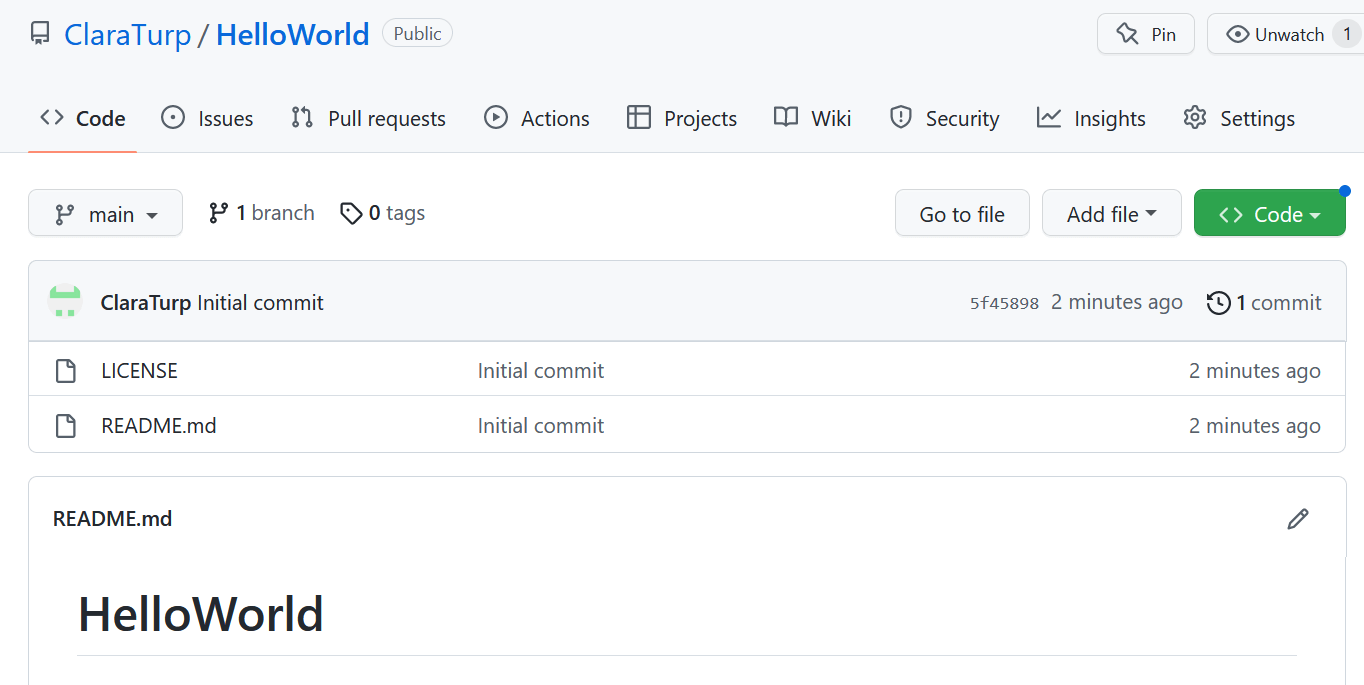
Now that we have a repository, let’s introduce two new Git concepts:
- branch main. A Git repository can be split into multiple branches that can be changed and modified independently before merging them eventually. New repositories start with only one branch, named main by default. In this workshop, we mainly work on the main branch.
- commit. The git commit command saves your changes to the repository. You can see that there was an initial commit to create the README.md file.
Updating a file in a repository
Now, let’s make a change to the README file.
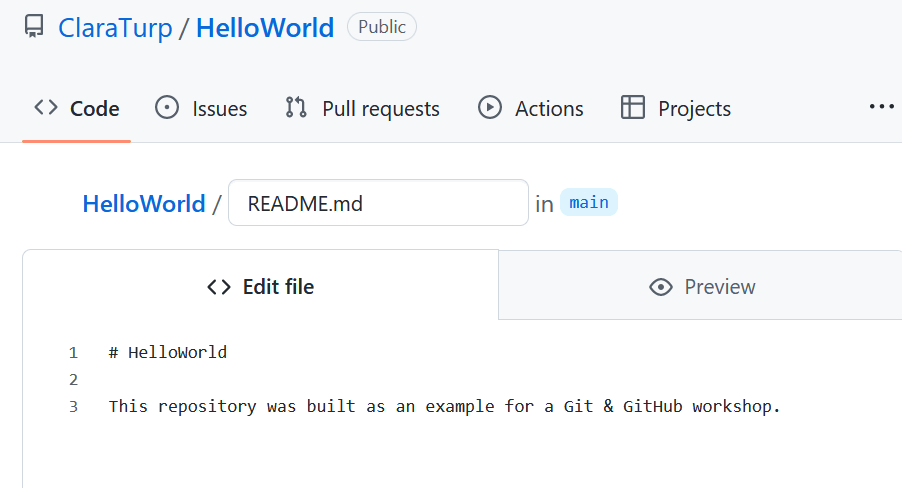
Click on the pen at the top right corner of the README.md file. Git and GitHub use the Markdown markup language to control how the text displays. Notice the # before the HelloWorld text. This is the Markdown (md) language markup identifying a header. One hash symbol for a first level header, two hash symbols, would be for header two. You can preview the text written, to make sure it appears the way you want it to appear.
At the bottom of the page, you can notice a box with the heading: Commit changes. This box is the way to save the changes. It is a good practice to add a description of the changes committed. Since Git is often used for version control, the description allows you to go back to a specific previous version.
For this example, we can simply write: Add a description of the project in the README file.
You can choose whether you want to commit the changes to the main branch or to a new branch. A general good practice is to use a development branch, where you test new functionality before merging them to the main branch through a pull request. For this workshop, we will use the main branch.
Here is another Git concept that is often used in combination with branches:
- Pull request. A GitHub feature that allows the owner of the main project repository to “pull” in changes made in branches of the repository. When it’s time to merge your own work with the main project repository, submit a “pull request” from your branch. For more information about pull requests: https://docs.github.com/en/pull-requests/collaborating-with-pull-requests/proposing-changes-to-your-work-with-pull-requests/about-pull-requests
Viewing the file’s history
You can now look through the file’s history with all the different commits that have happened over time. When you see … next to the title of the change, you can click on it to review the description you added to that commit.
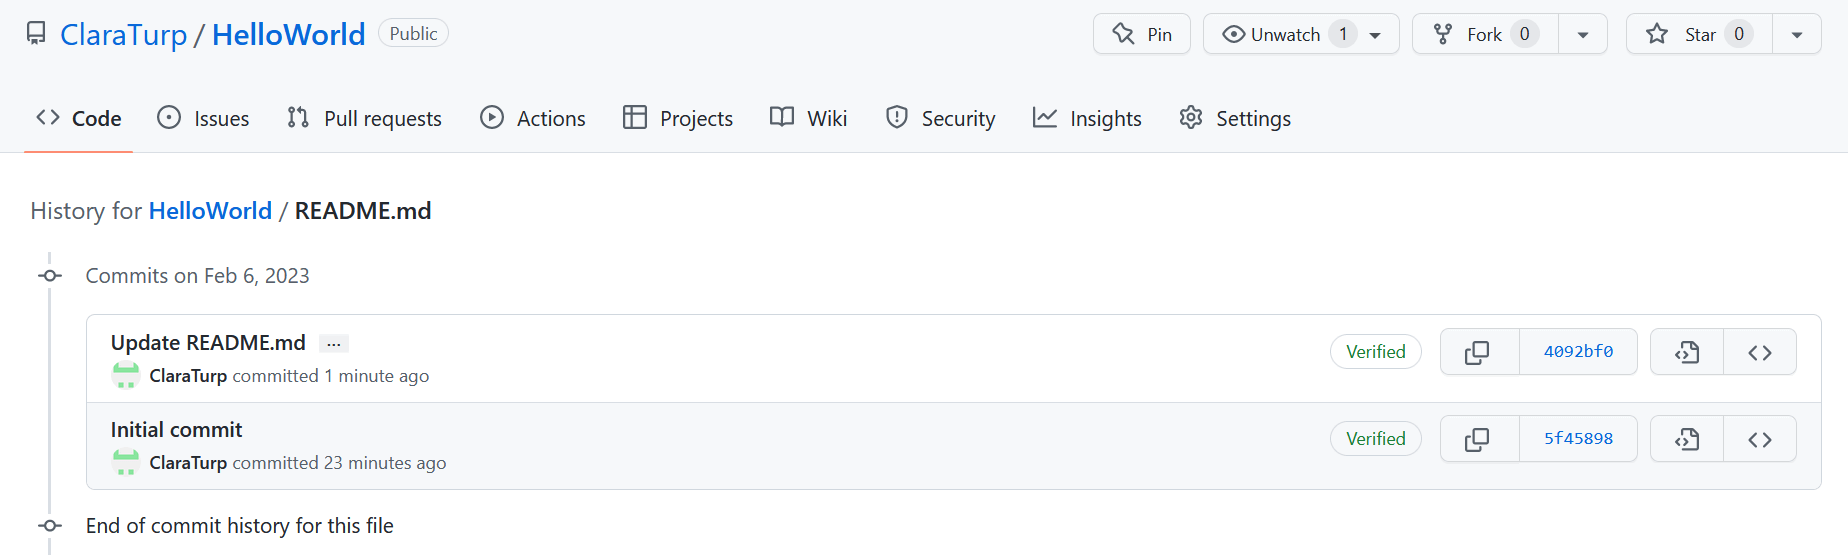
You have access to a few options from the history page. You can view the commit details. This shows you all the changes made through that commit, you can see exactly what was added, or removed.
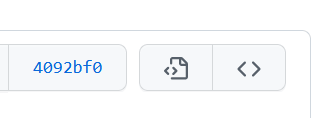
The page with less than and greater than symbols allow you to return to the file at that specific point in the history.
Finally, the less than and greater than symbols allow you to return to the repository at that point in the history.
These features show you both the power of Git and GitHub, while also proving the importance of proper documentation. Especially when considering GitHub is a tool for collaboration.
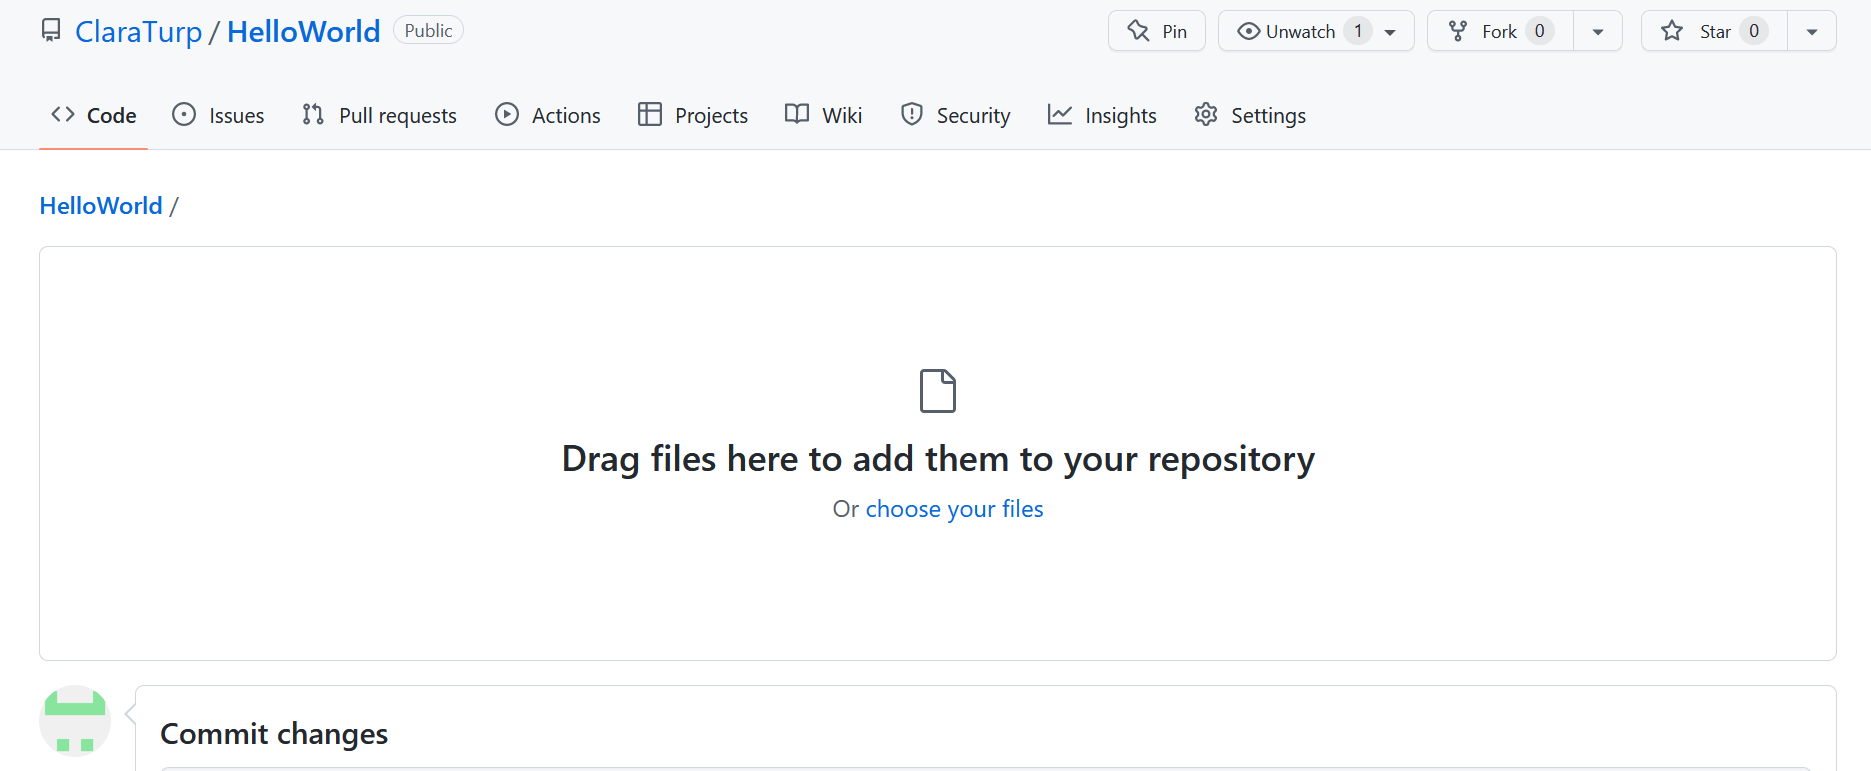
Adding a file to the repository
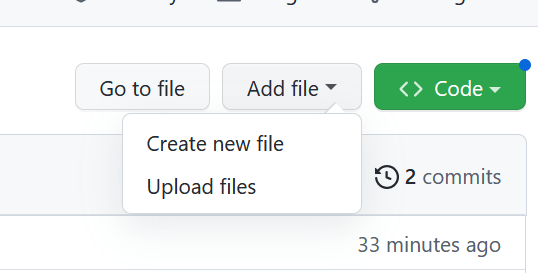
You can click on the Add file button on the right corner of the file list. You can see the two different ways to add a file to the repository:
You can create a file:
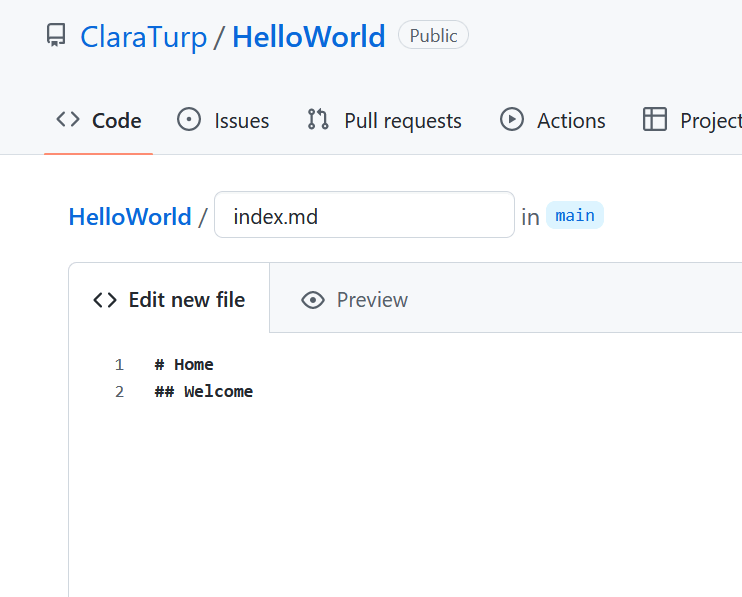
When you create a file, the first thing you want to do is to choose the filename and file extension. If you want your file to be in a sub-folder, you can type the name of that folder in the title with a ‘/’, this will create a new folder.
You can create a file called index.md. On that document, please write a first heading saying Home and a second heading with Welcome.
Finally, you want to add a description for these changes and commit the new file.
You can upload a file:
If you want to upload a file to your repository, you can click on upload files. You will be brought to a dialogue page to browse your computer or drag-and-drop box where you can leave files. Once your file was added, you want to, once again, commit those changes.
Here are some of the Git commands and GitHub features you will encounter:
- Fork. A GitHub feature that makes a copy of another GitHub user’s repository in your own GitHub account. You have full control over the fork because it’s in your account.
- Clone. A Git command that makes a local copy of a GitHub repository on your own computer. It allows you to write and edit using your preferred software, then commit and push your changes back to the repository on GitHub. (You can only push the changes back to GitHub if you have permission to edit the repository on GitHub.)